When it comes to managing images on your WordPress website, you may have noticed that WordPress and your theme automatically crop them into different sizes. While this might seem convenient at first, it can actually cause some issues down the line. Let me explain why.
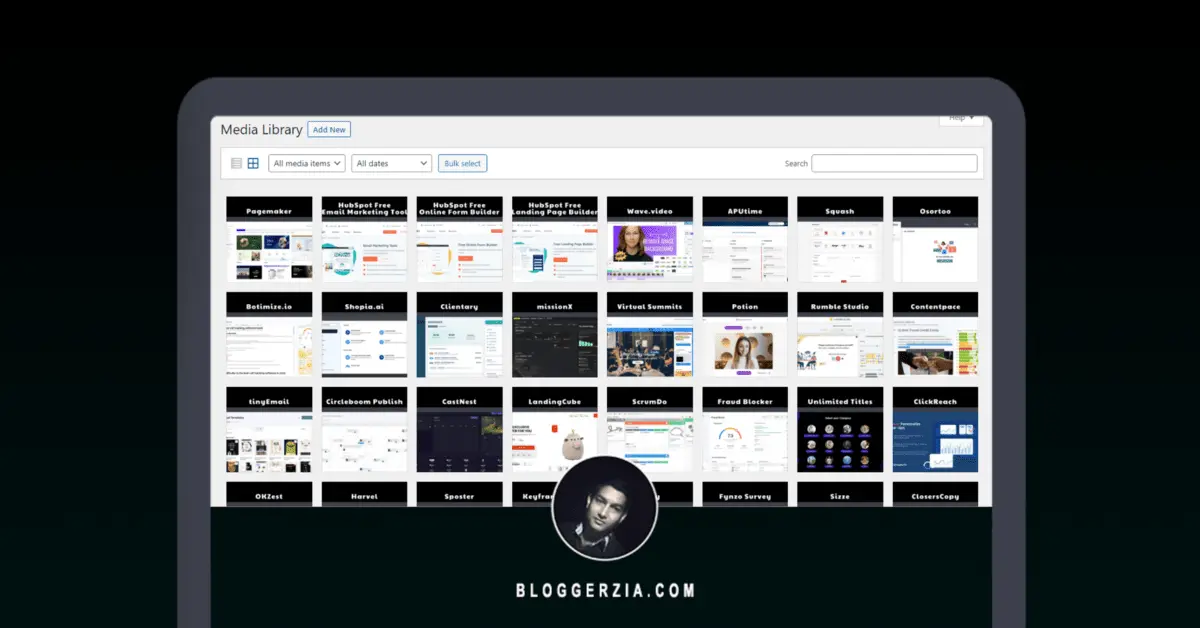
You see, every time you upload an image, WordPress generates multiple copies of that image in various sizes. This means more storage space is taken up, more inodes are used, and it even increases the time it takes to back up your website. It’s a hassle, especially if you have a lot of images on your site.
But don’t worry, I’m here to show you a simple way to take control of this situation. In this beginner’s guide, I’ll walk you through the steps to stop WordPress from cropping your images automatically. By doing so, you’ll not only save storage space but also optimize your website’s performance.
So, if you’re ready to take charge and say goodbye to unnecessary image cropping, let’s dive right in!
Understanding Image Cropping in WordPress
Before we dive into how to stop WordPress from automatically cropping your images, let’s first understand what image cropping is all about. In WordPress, image cropping refers to the process of resizing and shaping an image to fit predefined dimensions.
When you upload an image to your WordPress website, it creates different versions of that image in various sizes. These different sizes are typically determined by your theme and can include thumbnails, medium-sized images, and even larger versions of featured images.
Let’s check. Go to your Hosting panel > File Manager > [Domain root directory] > wp-content > uploads.
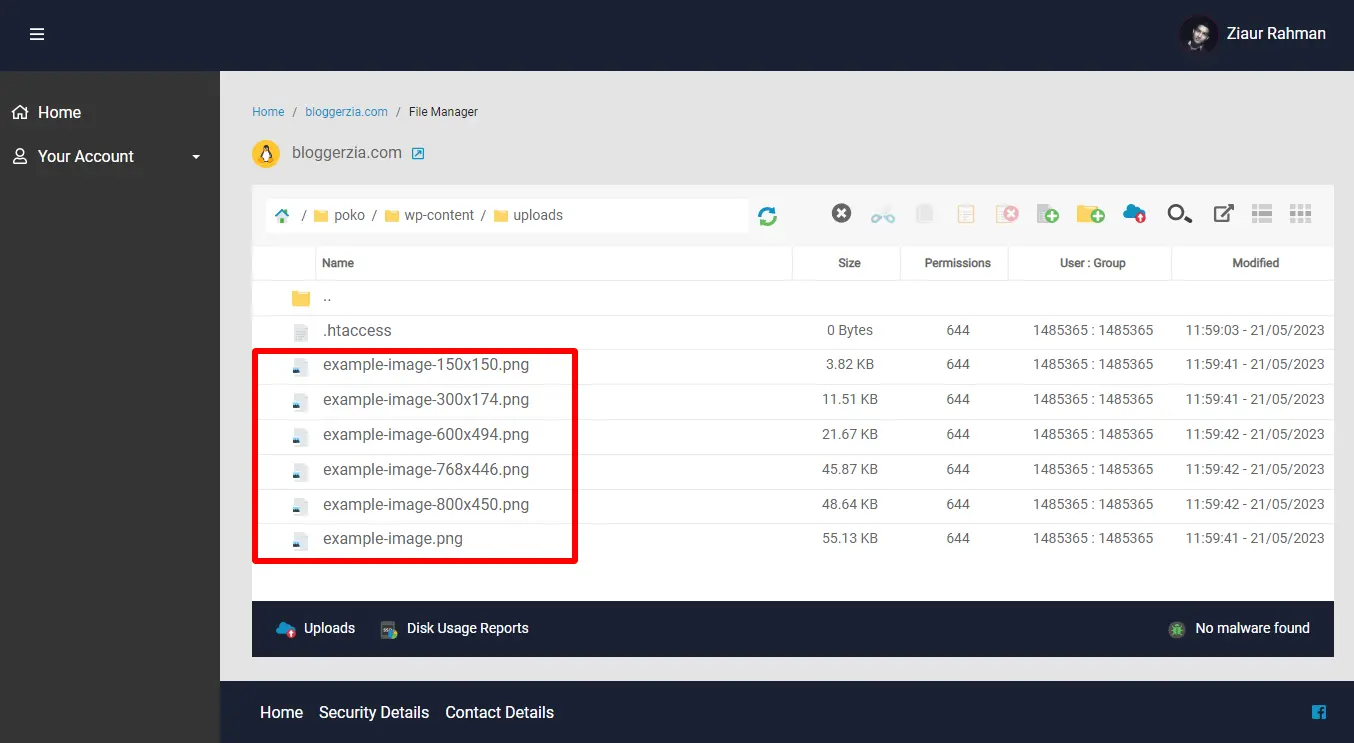
The purpose of this automatic cropping is to ensure that your images display properly across different areas of your website, such as in blog posts, galleries, or widgets. For example, if your theme requires a specific size for the featured image on your blog posts, WordPress will automatically crop the uploaded image to fit that size.
However, the downside of this automatic cropping is that it can lead to unnecessary duplication and bloating of your image library. Each cropped image takes up additional storage space, which can become a problem if you have many images on your website.
Moreover, the more images you have, the more inodes are consumed. Inodes are data structures used by the server to store information about each file or folder. Running out of inodes can cause issues with your website’s performance and functionality.
To top it off, automatic cropping also increases the time it takes to back up your website. Imagine waiting longer for your backups to complete just because of all those extra image sizes.
Now that we understand the drawbacks of automatic image cropping, let’s explore how we can take control and put an end to this unnecessary cropping. Stay tuned!
Disabling Automatic Image Cropping in WordPress
To disable automatic image cropping in WordPress, we’ll follow two steps. First, we’ll adjust the default WordPress media settings, and then we’ll add a code snippet to the functions.php file of your theme.
Step 1: Adjust Default WordPress Media Settings
To begin, we’ll set the default media size to 0 for all image sizes in WordPress. Here’s how you can do it:
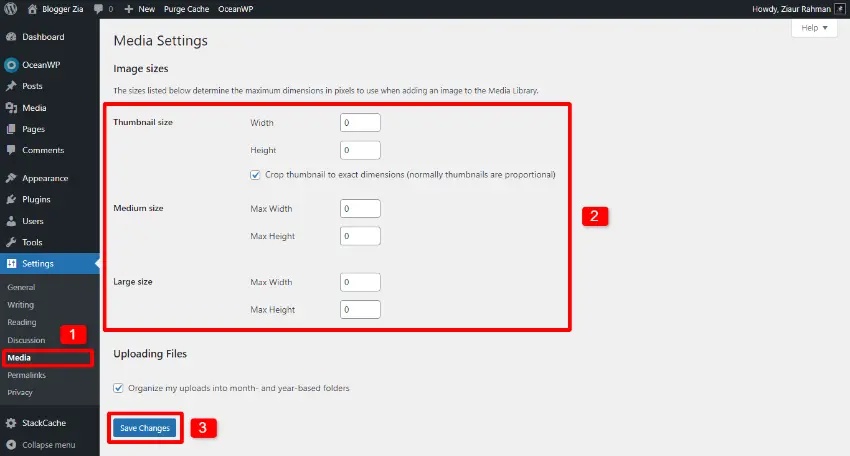
- Access your WordPress admin dashboard and navigate to the “Settings” section.
- Click on “Media” to open the media settings page.
- Look for the “Image sizes” or “Thumbnail sizes” section.
- You’ll find options for different image sizes like thumbnail, medium, and large. Set the dimensions for all these sizes to 0 or remove the values entirely.
- Save the changes by clicking on the “Save” or “Update” button.
By setting the dimensions to 0, you’re essentially telling WordPress not to generate any cropped versions of the images.
Step 2: Add a Code Snippet to Your functions.php File
Now, let’s add a code snippet to the functions.php file of your theme to reinforce the changes we made in the default media settings. This will ensure that WordPress won’t crop images for the specified sizes.
Here’s what you need to do:
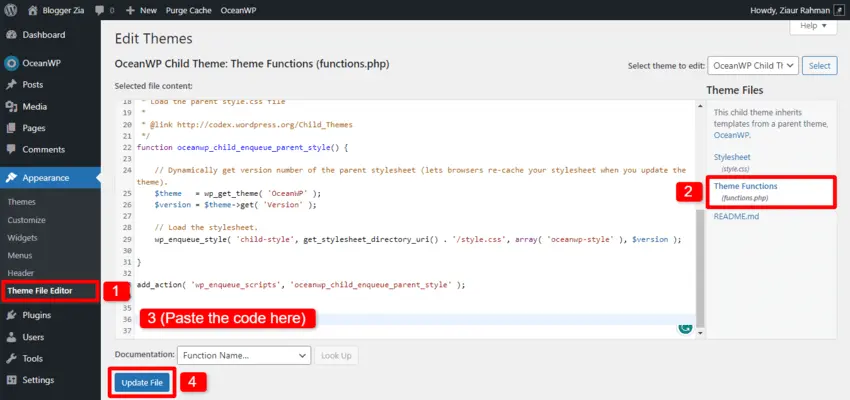
- Access your WordPress admin dashboard and navigate to the “Appearance” section.
- Click on “Theme Editor” to access the theme editor interface.
- On the right-hand side, locate and click on the “functions.php” file to open it in the editor.
- Now, you need to add the following code snippet to the functions.php file:
// DISABLE IMAGE CROPPING
function bloggerzia_disable_crop( $enable, $orig_w, $orig_h, $dest_w, $dest_h, $crop )
{
    return false;
}
function bloggerzia_disable_extra_image_sizes() {
    foreach ( get_intermediate_image_sizes() as $size ) {
        remove_image_size( $size );
    }
}
add_action( 'init', 'bloggerzia_disable_extra_image_sizes' );
add_filter( 'image_resize_dimensions', 'bloggerzia_disable_crop', 10, 6 );
This code snippet targets the default image sizes like thumbnail, medium, and large, and prevents WordPress from generating cropped versions for them.
- After adding the code, click on the “Update File” button to save your changes.
With these steps, you have successfully disabled automatic image cropping in WordPress. WordPress will no longer generate cropped versions for the specified sizes.
Considerations and Common Practices
Before we conclude, let’s discuss a few considerations and common practices related to disabling automatic image cropping in WordPress. These will help ensure a smooth experience and optimal results on your website:
- Custom Themes: If you’re using a custom theme or a theme that has its own cropping functionality, the code snippets provided may not work as expected. In such cases, it’s best to consult the theme documentation or reach out to the theme developer for specific instructions on disabling image cropping.
- Child Themes: If you’re using a child theme, it’s recommended to add the code snippets to the functions.php file of the child theme rather than the parent theme. This ensures that your modifications are not lost when the parent theme is updated.
- Regenerating Thumbnails: After disabling automatic image cropping, you might want to regenerate thumbnails for existing images on your website. This ensures that the changes are applied retroactively. You can use plugins like “Regenerate Thumbnails” or “Force Regenerate Thumbnails” to accomplish this.
- Manual Image Sizing: With automatic cropping disabled, it’s important to manually optimize and size your images before uploading them to WordPress. This ensures that you have control over the dimensions and quality of the images, resulting in better website performance.
- Image Compression: Along with manual sizing, consider using image compression techniques or plugins to reduce the file size of your images without compromising quality. This helps improve page load times and overall website performance.
- Theme Updates: Keep in mind that when you update your theme, any modifications made to the functions.php file may be overwritten. It’s a good practice to keep a backup of your customized functions.php file or use a child theme to preserve your changes during updates.
By considering these points and following common practices, you can effectively manage image sizes and optimize your WordPress website without the hassle of automatic cropping.
Conclusion
In this beginner’s guide, we explored the issues caused by automatic image cropping in WordPress and learned how to disable it using code snippets in the functions.php file. By taking control of your image sizes, you can save storage space, improve website performance, and streamline your backup process.
Remember, always test and verify the changes you make to ensure they have the desired effect on your website. If you encounter any issues, consult the theme documentation or seek assistance from the theme developer or WordPress support forums.
Congratulations on taking the first step towards a more efficient WordPress website! Enjoy the freedom of managing your image sizes just the way you want. Happy optimizing!